How to Grant Application Impersonation Rights in Office 365 - Revealed
OVERVIEW TO APPLICATION IMPERSONATION ROLE IN OFFICE 365
This blog is a complete user guide which will be discussing about what exactly does application impersonation reffer to in any Office 365 setup, how to create a user in Office 365, why we should impersonate a user, and various methods which will explain how to grant application impersonation rights in Office 365.
In the situations where the users want to migrate mailboxes from other e-mail platforms to Office 365 or Exchange, they need to have full access enabled for Office 365 accounts to facilitate the migration without setting up complex user roles. Office 365 provides a feature named, application impersonation, which enables a user to impersonate users in an organization to perform tasks on his behalf. Application Impersonation is used in the cases where a single user account needs to access multiple user accounts.
Let us explore why we should assign Application impersonation management roles to the users.
WHY TO IMPERSONATE USER MAILBOX IN OFFICE 365?
The Application Impersonation role in Office 365 has many benefits, the following are few common reasons for setting up impersonation in Office 365:
- Reduces the affect of throttling and connection limits.
- Allows to migrate multiple mailboxes concurrently.
- Eliminates "Connection did not succeed" errors.
- Uses an O365 admin account without assigning any license to it.
Let us now look into various methods to assign application impersonation management role in office 365.
HOW TO GRANT APPLICATION IMPERSONATION RIGHTS IN OFFICE 365?
As discussed above, the mailbox impersonation in Office 365 is beneficial to the user or the organization as well. There are two ways to assign application impersonation management role in Office 365. The two methods to impersonate user in Office 365 are:
- Using PowerShell
- Using Exchange Admin Centre
Let us learn more about the two methods in the section below.
SETTING UP OFFICE 365 APPLICATION IMPERSONATION USING POWERSHELL
- Run the PowerShell.
- Also verify the PowerShell version by typing:

- The blank response indicates that you are using version 1.0
- The which are newer than version 2.0, you should refer the detailed response.
- To avoid compatibility issues; keep the PowerShell updated.
- To manage the permissions or roles locally; execute the commands in EMS (Exchange Management Shell)
- Verify if the user account already has the impersonation rights assigned or not. Execute the following command:

where <account name> is the name of the administrator account on the target server you want to check
- Add mailbox impersonation roles:
 where <impersonation Assignment Name> is a name of your choice. Be cautious that each assignment should have a unique name.
- You can remove impersonation permissions with the following command if necessary:

ADD APPLICATION IMPERSONATION PERMISSIONS USING EAC (EXCHANGE ADMIN CENTER)
Please follow the steps discussed below to assign application impersonation in Office 365 using Exchange Admin Center or Console (EAC):
Step 1. Navigate to Permissions:
- Log in to the Office 365 Admin Center, and locate the Permissions section.
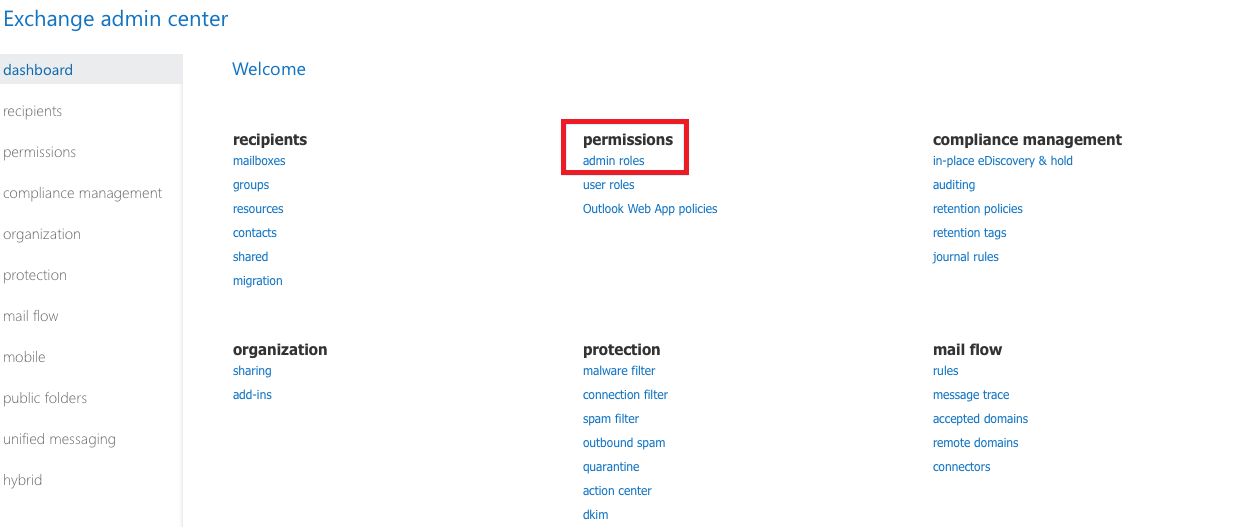
Step 2. Access Admin Roles:
- Within Permissions, you will find the Admin roles option click on it.
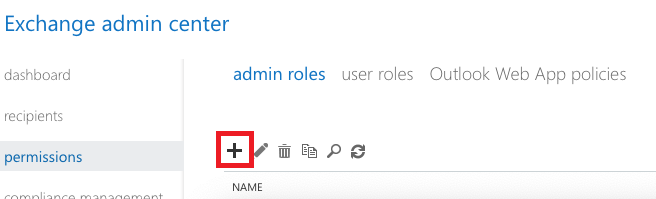
Step 3. Create a New Role:
- Click the + symbol to create a new role.

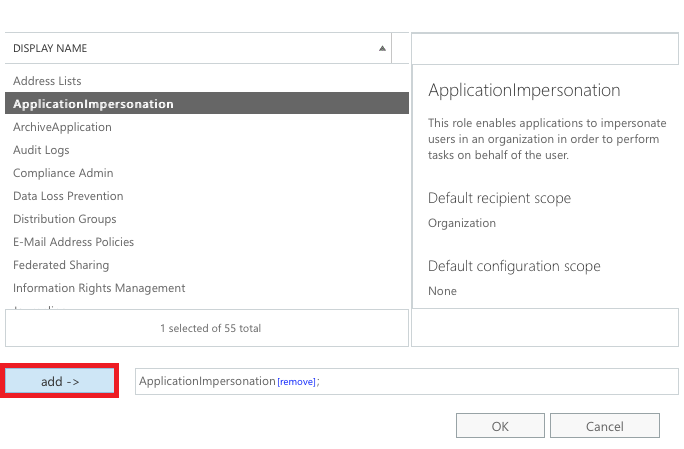
Step 4. Add Application Impersonation Rights in Office 365:
- Click the + symbol above Roles.
- From the dropdown list, select ApplicationImpersonation.
- Click Add, then OK to confirm.
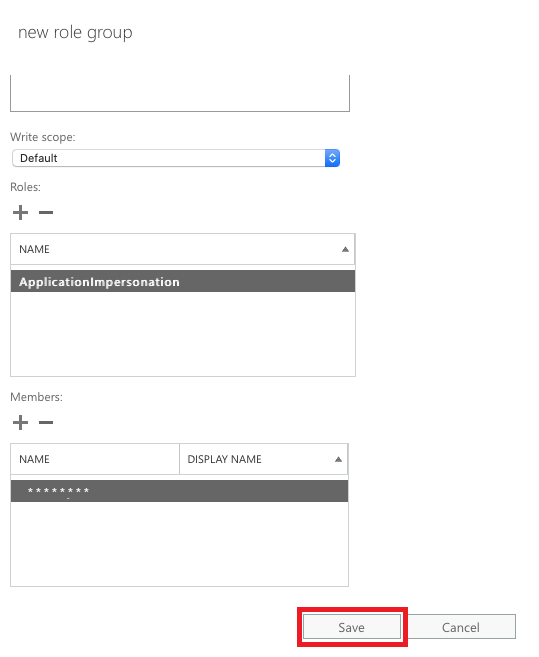
Step 5. Assign a Service Account:
- Click the + symbol above Members.
- Choose your desired service account from the list and click Add.
- Click OK to finalize the assignment.
BEST PRACTICES WHILE GIVING IMPERSONATION RIGHTS IN THE OFFICE 365 ENVIRONMENT
If you are new to assigning application impersonation, we recommend the following:
- Make sure that the administrator role and the application impersonator do not overlap. This is to minimize RBAC conflicts.
- If possible, create a new account that is purpose-built for whatever you are trying to achieve. Meaning if this application impersonation is for a migration, then make a new user account. Moreover, during impersonation, name it so that it matches its responsibility.
- An account with impersonated data can be a security vulnerability. Moreover, app impersonation does not end on its own. Thus once the task is complete remove impersonation and delete the account that had the impersonation privilege.
- Although you can still grant application impersonation rights in Office 365, Microsoft has already put out a notice that they are going to disable new app impersonation access in May 2024, with complete removal by February 2025. Therefore, we suggest that you decide by keeping this expiration date in mind.
- Microsoft wants its users to move on to the Graph API and delegation. However, these lack certain functionalities, like being limited to one-to-one/ one-to-the case in the case of delegation. In addition to that, there is significant coding expertise that is required to work with the API. All in all, it makes migration particularly difficult.Therefore, a better option is to choose a utility that bypasses the impersonation requirement for migrating Exchange data.
CONCLUSION
In this blog, we discussed about what is mailbox or application impersonation roles in Exchange Online or Office 365, the reasons why we should assign impersonation to a user account or mailbox, and two methods which show how to grant application impersonation rights in Office 365 using Exchange Admin Console or PowerShell commands.
FREQUENTLY ASKED QUESTIONS
Q. Why did Microsoft grant application impersonation in Microsoft 365 in the first place?
This method was added to serve as a replacement for user password retrieval during migration scenarios.
Q. What made Microsoft move away from allowing app impersonation in 2024?
After the cyberattack that exploited this vulnerability, Microsoft concluded that it was better to shut down this method entirely.
Q. Is impersonation still available for use in the Microsoft 365 Admin Center?
The ability to give new app impersonations will cease in May 2024. Any impersonation created before this deadline will continue to work until February 2025, after which all functionality ends.
Q. If I can no longer assign impersonation rights in Office 365, then what is the alternative?
Microsoft wants users to move on to the Graph API and delegation method to carry out the tasks previously done via application impersonation.
Q. Can migration be carried out without granting app impersonation?
Yes, for that, you need to use the professional Office 365 to Office 365 migration utility.