Migrate Shared Mailbox to Office 365 – Step-by-Step Guide


Synopsis: Struggling with PowerShell scripts while converting shared mailboxes to Office 365? Still concerned about downtime or data loss during migration? Worry not, as in this article, I am going to explain the step-by-step procedure to convert or migrate Shared mailbox to Office 365 user mailbox without data loss or communication disruption.
Shared mailboxes are a widely used feature in most organizations for managing common mailboxes such as info@company.com, support@company.com, or hr@company.com, etc. It allows multiple users to access and send email on behalf of that single email address, which enhances work productivity and collaboration.
Additionally, they come with no extra cost up to 50 GB of storage. Once the storage limit exceeds 50 GB, the admin has to assign a license to keep it operational, or they can convert the shared mailbox to a user mailbox, which again requires a license.
However, when organizations transform or undergo Office 365 tenant-to-tenant migration, migrating these shared mailboxes becomes a challenging task, especially while maintaining the access permission intact.
So, without any further ado, let’s simplify this complex task in this detailed guide.
Why Migrate or Convert Shared Mailboxes to User Mailbox?
Before diving into the solution part, let’s explore and learn about the reasons why most IT admins often require converting shared mailboxes to Microsoft Office 365.
There can be several reasons for mailbox migration, such as an upcoming company merger, rebranding, or tenant consolidation. Another reason could be – organizations migrating to a new Office 365 tenant for better licensing or management. Apart from these scenarios, the separation of business units or upgrading from legacy systems to Microsoft 365 creates an urgent need for a shared mailbox for Office 365 migration.
Let’s discuss the different ways to perform this task, ensuring minimum downtime.
How to Migrate Shared Mailbox to Office 365, Ensuring Data Integrity?
To overcome technical challenges and a lengthy process including a PowerShell script, you can switch to a modern solution, such as SysTools Office 365 to Office 365 Migration Tool. It is an indigenous automated software that supports various complex migration workloads.
Additionally, it allows you to bulk migrate shared mailboxes to Office 365 user mailboxes, ensuring maximum data integrity while maintaining the folder hierarchy, permissions, and metadata.
Some of the Note-worthy Key Features:
- Direct support for shared mailbox to shared mailbox migration.
- Support for shared mailbox to user mailbox migration.
- Maintains folder structure, metadata, and permissions.
- Provides bulk user mapping and delta migration.
- Generates detailed real-time progress reports.
- Does not require PowerShell scripting.
- Offers 24×7 dedicated email, call, and chat support.
Method 1. Migrate Shared Mailboxes to Office 35 using Software
Note: There are a few prerequisites that you need to complete before heading to the migration, such as:
- For Windows, make sure to install Microsoft .NET Framework v4.8.0.
- Make sure to download Microsoft Visual C++ Redistributable Latest (Visual Studio 2015, 2017, 2019, and 2022).
- Destination User(s) should already be created at the destination Admin account.
- The admin account must have an Office 365 license assigned, and you must be able to access OWA for admin.
Now let’s discuss the steps:
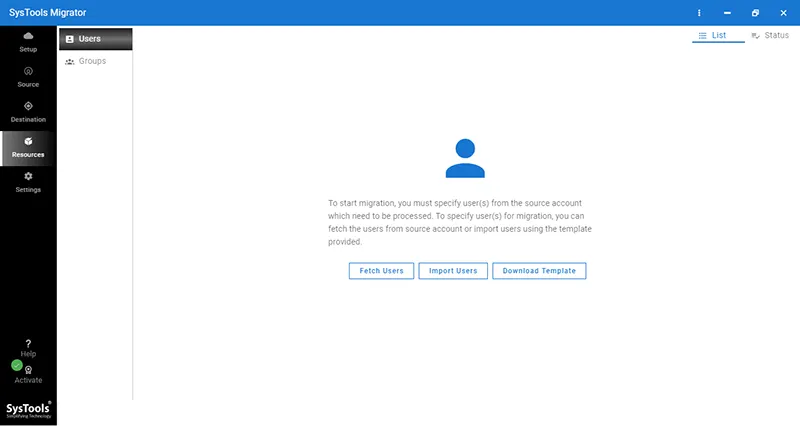
Step 1. Download the trial version from above and run the software on your local PC.
Step 2. From the main screen of the software, choose Microsoft 365 as the source and destination migration platform.
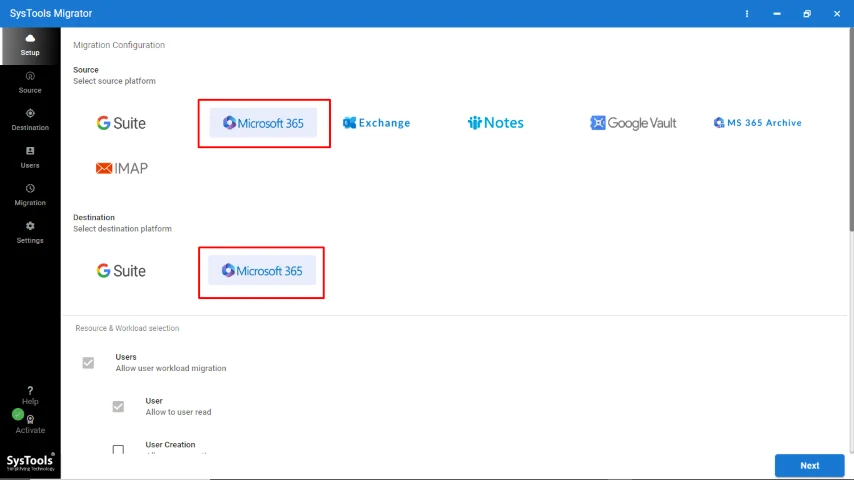
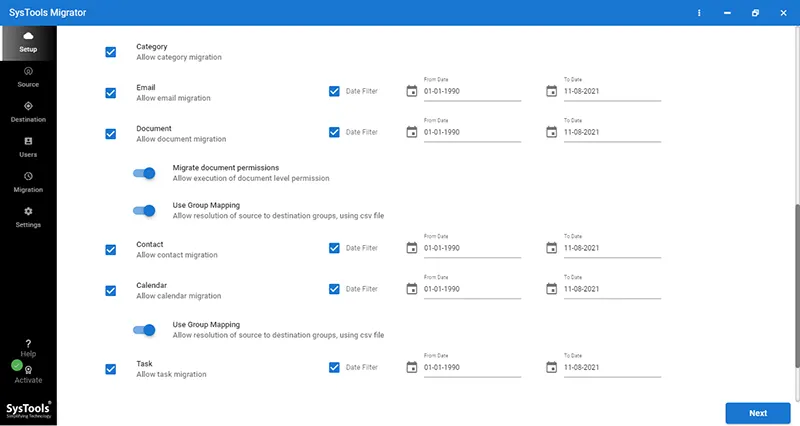
Step 3. On the same screen, scroll down to workload selection, and enable the required mailbox categories such as emails, contacts, calendars, etc. Set the built-in date filter for each category.
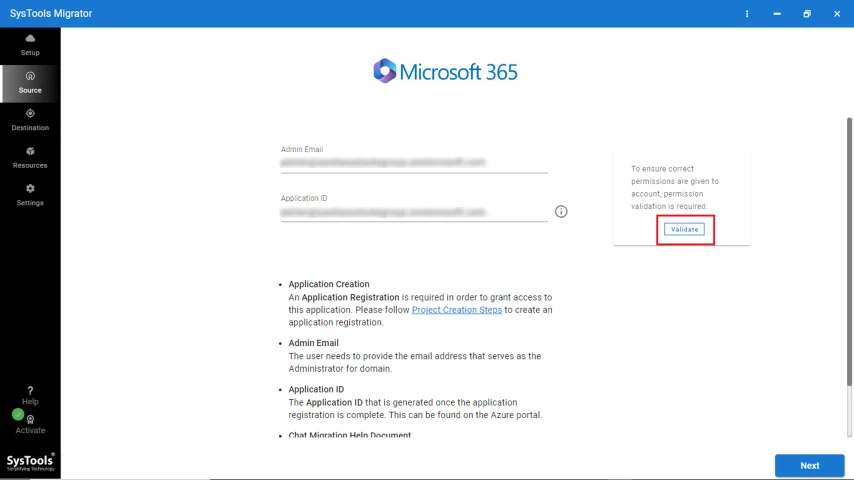
Step 4. In the source tab, use the source admin email ID and application ID and log in to the software, validate the required permissions, and proceed to the Next step.
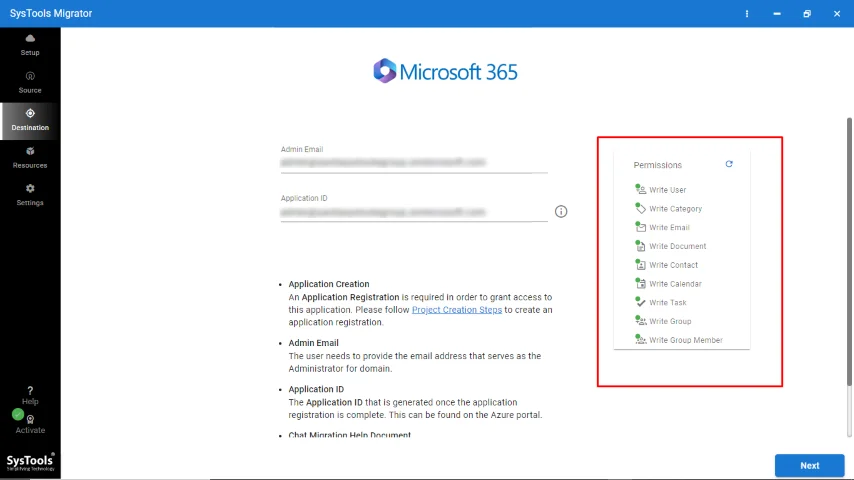
Step 5. In the destination tab, use the destination admin email ID and application ID and log in to the software, validate the required permissions, and proceed to the Next step.
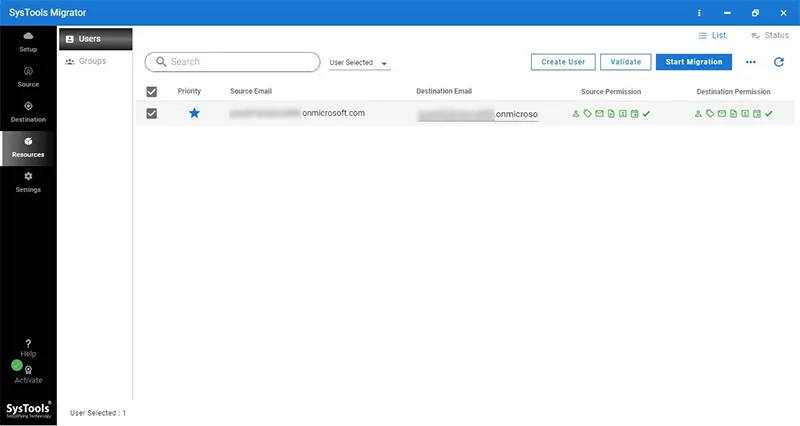
Step 6. For bulk data migration, use the mapping option and download a template file. Input the email addresses of source shared mailboxes and destination user accounts, and upload the template.
Step 7. Select the required mailboxes, validate permissions, and click on the start button to migrate shared mailbox to user mailbox.
With these few steps, you can migrate the entire shared mailboxes to Office 365 user or regular mailboxes, without the need for technical expertise or using PowerShell. It saves time, effort, and reduces the risk of data loss or downtime, while maintaining data integrity and compliance.
Once the migration is completed, the software will allow you to download a summary and detailed report, which you can share with the stakeholders.
Method 2. Convert Shared Mailboxes Using PowerShell
Since the manual method involves using the PowerShell scripts and the Microsoft Admin Center. Hence, if you want to use the manual method, which is primarily a free way of performing this task, you have to ensure the following privileges;
- Make sure you have the global admin or admin privileges.
- You must have PowerShell proficiency to run cmd scripts.
- Make sure you have access to Exchange Online PowerShell.
- You must assign a valid Microsoft 365 license (e.g., E1, E3, Business Standard) for the user mailbox after conversion.
- Before converting the mailboxes, make sure to create a local backup, just to ensure data availability in the event of data loss.
PowerShell Commands to Convert Shared Mailbox to a User Mailbox
Step 1. Run the below PowerShell command to connect to Exchange Online. (If not connected)
Connect-ExchangeOnline
Step 2. Replace the below variable with your shared mailbox address. For instance, I am taking info@company.com as the shared mailbox email ID.
Note: # Replace with your shared mailbox email address
$Mailbox = “info@company.com“
Step 3. Run the below command to convert this shared mailbox to a user mailbox.
Set-Mailbox -Identity info@company.com -Type Regular
Step 4. Now, to verify this change, you can run the following commands.
Get-Mailbox -Identity info@company.com | Select-Object Name, RecipientTypeDetails
Step 5. It will show you as follows.
# Result

Name RecipientTypeDetails

—- ——————–

info-test UserMailbox
By executing these PowerShell scripts, you can easily convert the shared mailbox to an Office 365 user mailbox.
You must be thinking, if these few steps allow you to convert the shared mailbox, then the PowerShell method is the right way for you. But here is the bitter truth about this manual method.
Method 3. Convert Shared Mailbox User Mailbox Using Exchange Admin Center (EAC)
- Step 1. Sign in to Exchange Admin Center using the Admin credentials.
- Step 2. Go to Recipients and click on Mailboxes.
- Step 3. From the list of mailboxes, select the Shared mailbox that you want to convert.
- Step 4. Click on the More icon (⋯) and click on Convert to regular mailbox.
- Step 5. Confirm the prompt after the conversion. Lastly, it will show a confirmation popup with the message “Mailbox converted successfully”.
Shortcomings of the Manual Method in Converting Shared Mailboxes
- Time-consuming and complex
- Requires PowerShell proficiency
- No real-time monitoring or reporting
- Inconsistent data and permissions migration
- Potential data loss or skipped permissions
- No option to set a date filter for selective migration
- Does not provide any report for compliance or auditing
Post Conversion Tasks
- Once the shared mailbox is safely converted to a user mailbox, you need to assign an appropriate license. Without assigning a license, the user wouldn’t be able to sign in.
- Since it was a shared mailbox, it did not require a username or password to log in. After conversion, you need to reset the password to ensure continuous access.
Wrapping Up
Whether you are an IT admin or business owner facing an upcoming Microsoft 365 migration, it needs to go smoothly, securely, and error-free. Though you can use the PowerShell method (If technically sound) for a one-time shared mailbox to Office 365 migration. However, when it comes to reliability, scalability, accuracy, and efficiency, choosing professional software as discussed above can be a game-changer.
Try the Free Demo Today and experience hassle-free and quick data transfer.